Tuesday, March 27, 2012

Lil Bee's Product focus: My Favorite Things Dienamics

Hello Crafters,

Had a busy day yesterday so posting Lil Bee's Product Focus today.
The winner of last product focus is:

I would go with Cover-a-Card Paisley Crystal Code: CC036 stamp. I feel the design on this stamp would look good on a retro and vintage theme project. The stamped image can be brightly colored to achieve a retro look and using distress inks along with various aging techniques the vintage look can be achieved."

Congrats Vinitha!

Now its turn for Lil Bee's product focus and today we have Dienamics from My Favorite Things in the spotlight. They are American made steel dies which can cut through a lot of different materials and work in all die cutting machines.


The first is Dienamics Tea Party Doily, amazing diecut but sometimes takes a while to take out the little cut pieces. Its better to cut few at a time and store for future projects.


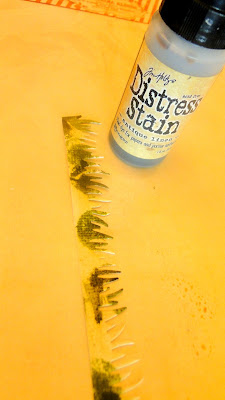
Next we have Dienamics Fresh Cut Grass, best for using with cards.

To bring in shades I have first dabbed the Grass diecut with Peeled Paint distress stain.
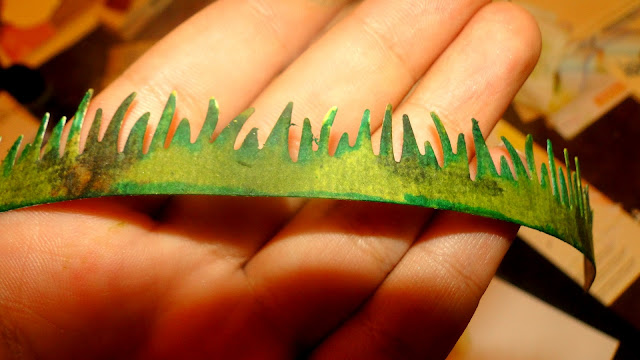
 Then I have dabbed Forest Moss distress stain in few places.
 To mix both ,I have covered the whole with Antique Linen Distress stain.
 Added a few dabs of Vintage photo distress stain.
 Then covered the whole diecut with Peeled paint distress stain.
And finally colored the edges with Peeled Paint distress markers.

Next we have Dienamics Mini Rolled roese. I just love them. They are tiny roses suitable for all projects.

 I have covered these roses diecuts with Chalk mists from Tattered Angels. Then I stamped the smaller rose with the dot stamp available in Dienamics Tea party die cut and stamp set.


Then we have Retro Rolled flower, this is a little larger than the mini rolled roses.


  I have stamped this diecut with mini hearts from Lawn fawn stamps.

 Another flower is the rolled mum.
 I have stamped with small dot stamp from the same Tea party set and then colored the edges with Copics Spica brown.

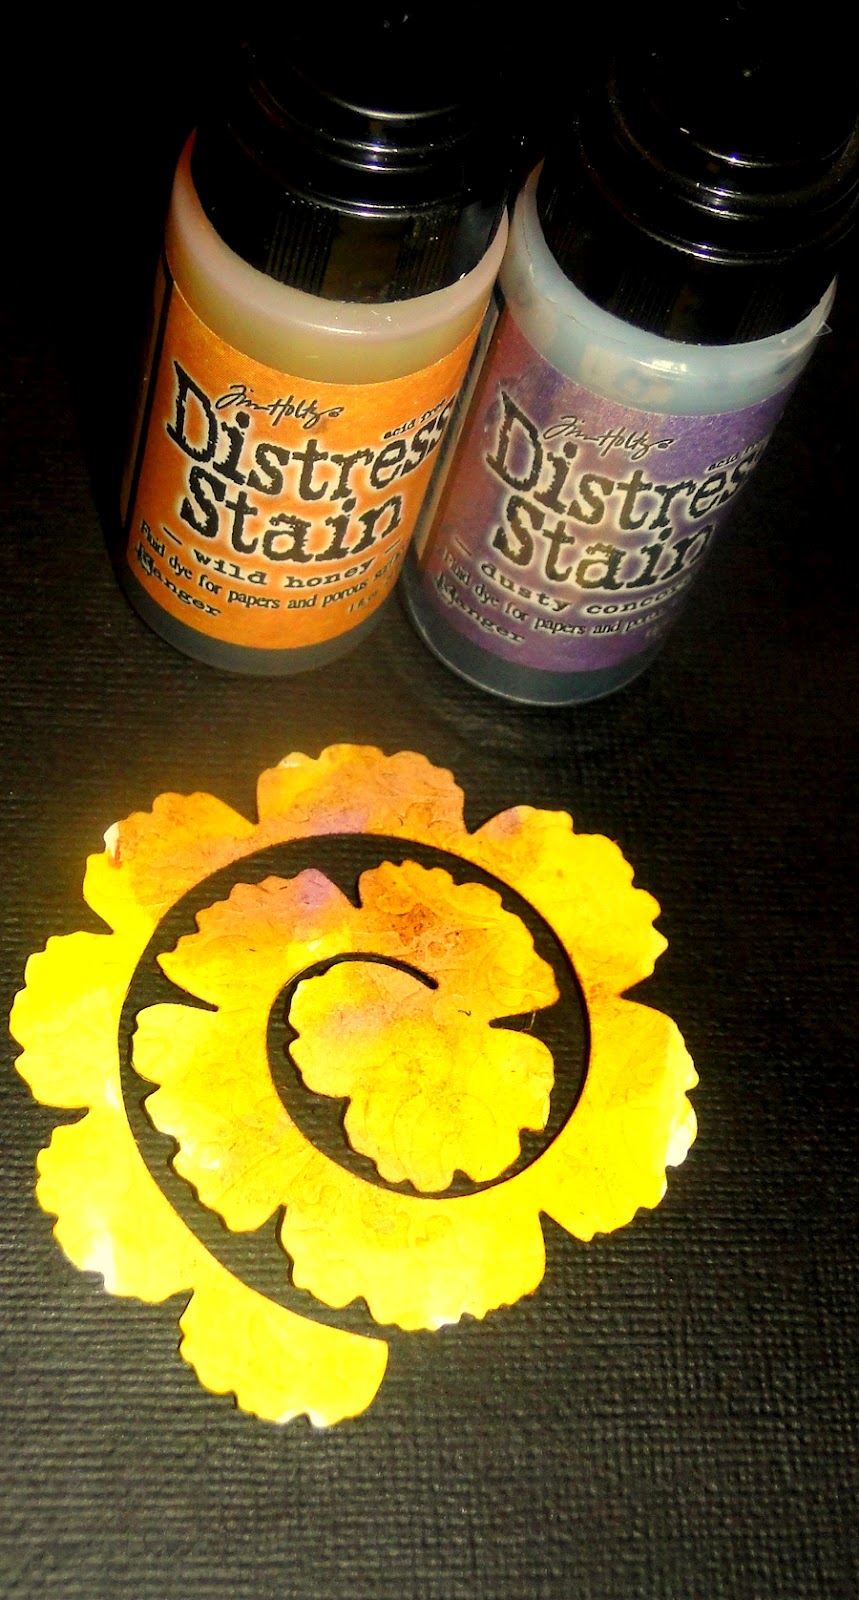
 Last is the Royal rose, Also one of my favorites.


 I have covered the diecut with Distress Stains.
 After rolling it and gluing together, I have sprayed the centre with pink chalk mist by Tattered Angels.
 And then using glossy accents ,i have filled the centre of the rose with beads.
Here are all the flowers .
 You can use them individually or bunches and they make an excellent accent to your project. If you don't want to use inks, stamps or mists, then just use patterned papers to cut them and have the flowers match your project!


So to win one of these MFT Flowers dienamics, just comment on how would you use them!

Winner will be chosen in next episode of Lil Bee's Product focus!

Happy Crafting!

Saturday, March 24, 2012

Lil Bee's Mother's Day kit and Inspiration!

Hello Crafters,

Thanks to Jumping Jax Designs Lil Bee's Boutique now has a new look. Hope you like the new Lil Bee, would love to have your feedback.

Here is Lil Bee's "Mom is Special " kit and inspiration from our Design Team!

 100dhs (2 packs left)
Kit Includes:
  • Paper from American Crafts
  • Chalk ink from Prima
  • Say it in Studs from Prima
  • Thanks a Bunch stamp from American Crafts
  • Pinwheels embellishments from American Crafts
  • Tags and lettering's from Silhouette

Nandini Rao:
I love how Nandini has embellished the card with matching quilled roses.

Sue Percival-Simmons: 


For a tutorial on the page, visit Sue's blog.

Hana Atif:

Happy Crafting!

Wednesday, March 21, 2012

Happy Mother's Day !

Hello Crafters,

What makes a mom so special and important cannot be better explained by Lil Bee's Creative ladies:


"Mom... is someone who inspires you to do things you dream of, helps you overcome any hurdles you face and supports you when the whole world is against you, well one can go on and on....
I am very lucky to have a Mom who, in every manner was and is the perfect Mom. 
When I am with my boys, I do think about how hard it must have been for her to bring us up when we were young, when there were not many of the present day luxurious amenities, 
And each day goes thanking her to have brought us up the way she did, not just on the Mother's Day. 
Happy Mother's Day Mom..."


                                 Teju Venkat


“My favourite Mother's Day poem - not from my Mum, but in a handmade card from one of my children...
 Best friends forever, my Mum and me,
Whether picking flowers or climbing a tree.
A shoulder to cry on, secrets to share,
    A lovely warm heart and hands that care!”                          
 
                       Sue Percival-Simmons


“I learnt to appreciate crafting from my MOM. Even as a little girl ,I remember my mom busy sewing or knitting  or crocheting. She was always enthusiastic about learning new  things. When I was old enough to use a needle ,I learnt embroider from her. She was a perfectionist and made me redo my work till she was satisfied.
I can't say I was very happy with that then ,but I can now appreciate the need to achieve perfection as far as possible. She has always been a guiding force behind all my achievements. She is no longer with me ,I do miss her terribly  but she will always be with me inspiring me to reach beyond myself at every turn.”                 
                                Nandini Rao


 "God’s greatest gift to me, I cannot thank him enough!”                          
                                         Hana Atif


Hana

Monday, March 19, 2012

Lil Bee's Product focus:Cover-a-Card Stamps by Impression Obsession


 Hi Everyone,

Welcome to the second episode of Lil Bee's Product focus. This Monday we have Cover-a-Card Stamps by Impression Obsession. These are 5.75' square stamps and I must say very detailed and useful ones.

Here are some backgrounds I created with them:
Supplies:
Distress Stains
 Distress Inks

Cover-a-Card Lg. Paisley Stamp by Impression Obsession


Mega Mount: "This is a 6"" x 6"" slightly curved acrylic block with a handle. It is made to make stamping large stamps easier and goes with  Cover-a-Card cling background stamps.


Cover-a-Card Rose Lace Stamp by Impression Obsession


The background below was created by stamping CC Paisely stamp with Distress walnut Stain Ink.

The background below was  created by stamping CC Paisely stamped with Wild Honey ink and then stamped with Walnut Stain ink. 

 The background below was  created by stamping CC Paisely  stamped with Wild Honey stain.


 The background below was  created by stamping CC Paisely stamped first with Wild Honey stain and then stamped with Walnut Stain ink.

 An overview of  the above backgrounds:left top stamped with Walnut Stain ink . Right Top stamped first with Wild Honey stain and then stamped with Walnut Stain ink. Left bottom stamped with Wild Honey ink and then stamped with Walnut Stain ink. Right Bottom stamped with Wild Honey stain.
 
 Below are 4 backgrounds : left top stamped with Walnut Stain ink and then Antique Linen stain swiped over. Right Top stamped first with Barn door and Broken china stains and then stamped with Memento black. Left bottom stamped with Antique Linen stain and then stamped with Walnut Stain ink. Right Bottom stamped with Walnut Stain ink.
Here is card made by Swati Jain, using CC Rose Lace stamped first with Antique Linen Distress Stain and then with Walnut Stain Ink.


Some of my favorite stamps from the collection.


For a chance to win one of these amazing stamps, just visit Impression Obsession's store (http://www.iostamps.com/mm5/merchant.mvc?Screen=CTGY&Category_Code=2CAC) and let me know which one is your favorite Cover a Card stamp and why, in the comments below.
Will choose a random winner at the next Lil Bee's Product focus episode.

Hana


Sunday, March 18, 2012

Moms are Special!

Hello everyone,

Happy Sunday to you ! Today we have Lil Bee's DT Nandini showcasing a project from one of the Lil Bee's Mom's special kits .
This kits is based on Prima's Nature Garden collection and comes packed with cards, flowers, blings and more. the kit will be revealed later this week.


The card gives a vintgy feel and just love Nandini's quilled flower.
Will be back with more.


Happy Crafting
Hana
x


Monday, March 12, 2012

Lil Bee's Product focus: Tim Holtz Distress Markers by Ranger

Every year after a CHA, I find myself waiting for the yummy new goodies to arrive by the post. Though they are tempting, it's hard to decide where to start with them, usually the tools and accessories.

So this year, I waited for Tim Holtz Distress Markers to arrive and to begin coloring my stamped images.
So ta daa here are the Tim Holtz Distress Markers!


Through Ranger we know that Tim Holtz Distress Markers are water-based inks for coloring, journaling, stamping and more. They are safe for scrapbooking too as they are Acid free, non-toxic
Available in Distress 37 color palette, that is 36 colors of Distress inks and Picket fence.


 So what did I tryout with them? I went through quite a lot of the reviews on these markers  (some good ones are available at the end of the post) but didnt find many techniques with them yet.

Anyways, I usually color my stamped image with Copics and am happy with that, so what I really wanted to try backgrounds with the Distress markers . I love to make my own backgrounds for using on cards, scrapbooks and my journals.

So what I came up was "The Wallpaper" effect. Let me take you through:

Supplies used:

Antique Linen Stain
Distress markers : Victorian velvet, Broken China, Shabby shutters, Forest moss, Vintage photo
Water spritz


 I took a Hero Arts folded card and covered it with Antique Linen Distress Stain, with horizontal application (above). Next I took a rubber stamp(any stamp with some coloring space would do) and colored in with 5 Distress markers. Flowers are colored with Victorian velvet and Broken China, the leave branches have no particular sequence of coloring. I spritz the colored stamp with just one spray application of water from a distance. wait for a few seconds and then stamp. If you press hard while stamping ,it will bleed more. see below the upper half of the card.


For the other half of the card I colored the stamp the same way(used Aged Mahagony instead of Victorian Velvet to check ) and then tried the huff way by Tim Holtz, I guess my huff and puffs were not strong enough, see below:

and below is the upper half with the first technique:

Now to show you the "Wall paper effect":

This time instead of coloring the card with Antique Linen stain, I stamped my image first in same way as above using the water spritz technique:


Then I swiped the Antique Linen stain horizontanly over the card only from left to right.
Swipe only once or twice over the stamped image or the image will bleed alot. Then at some place I reswiped with Distress stain but this time from right to left. This way the Distress Stain played with the Distress markers, bleeding them in two directions. This effect I named as the "Wall Paper effect". See Below:


Here is a comparison of the two techniques:

The left Hand side is "Wallpaper effect" and Right top is First technique with Stamp with water spray, and Right bottom is stamp with huff n puffs.


I keep these backgrounds in a box to come handy when I am working on a project.
Hope you liked today's Product focus with Lil Bee's Boutique. See you again with next episode of Lil Bee's Product focus on Monday, 19th March.


Till then enjoy some Distress markers reviews and demos here:


  • Demo by Tim Hotz at CHA by Paperclipping http://www.youtube.com/watch?v=SYAPWcZ3WSQ&feature=related
  • http://www.scrapbookupdate.com/2012/02/27/in-depth-tim-holtz-distress-markers/
  • comparison between Marvy, Zig and Distress markers: http://www.youtube.com/watch?v=4J99YfiWMPk
  • Colouring Magnolia: http://www.youtube.com/watch?v=PHeMexZwEcY&feature=related
  • http://www.youtube.com/watch?v=kY5h1jCSNPM&feature=related
  • http://www.youtube.com/watch?v=WOZJTzcmOwM&feature=related
Happy Crafting!
Hana